Monday 21 January 2013

Micromax A116 canvas HD with Quad Core

Micromax A110 is making a remarkable popularity in today's competitive market of smartphone because of it's low price and rich configuration( dual core processor with 5'' capacitive touch screen).

As expected micromax comes with a new smartphone A116 to beat the high end smartphone market of Samsung and htc .
First of all what we want more in micromax a110 are as follows:
  • Higher Resolution
  • Faster processor
  • Undoubtedly more RAM (more than 512mb!!!)
  •  Latest Android OS( Jelly Bean 4.1)
  • More Battery backup
  • Light Sensor.
Now its time for micromax A116 which hopefully provide all listed features with budget price.


 Specifications:

  • 1.2 GHz quad core Mediatek MT6589  processor
  • Graphics processor : PowerVR SGX5 GPU 
  • 5-inch (1280 x 720 pixels) HD IPS 16.7 million color display 
  • Android 4.1 (Jelly Bean) upgradable to Android 4.2 JB
  • 1 GB of RAM 
  • 4 GB of internal storage ,32GB expandable memory with MicroSD
  • 8MP rear camera with LED Flash, VGA front-facing camera 
  • HD video recording
  • 3G, WiFi 802.11 b/g/n, Bluetooth, GPS/A-GPS
  • 2100 mAh battery.
  • G-Sensor, proximity, light sensor
  • 3.5 mm audio jack  
 Price of Micromax a116 is around 15,000 INR.

if you have any doubt then u can put comment or mail me at patel.mj217@gmail.com .


Tuesday 15 May 2012

Access Local PC Server From Android phone Using WIFI (no root required))

Hello Friends...

      (For Not Rooted Android Phone)

  • I have seen lots of sites to connect my android device to the local PC sever (WAMP server) using WiFi.
  • Actually i wanted to access my local server from my android browser like we are accessing in our computer's browser and wanted to access database of pc from my android application.
  • But by default android phone does not connect to the ad-hoc network that is created in computer .
so guys lets start the steps.


  1. First of all Start Tethering from your Android Phone.[goto setting>Wireless and networks>Tethering and portable hotspot>Portable Wi-Fi hotspot (check it ).


2.  Now connect to that network from your pc using wifi.

3. Open Command Prompt and type ipconfig/all
    and press enter . It will show you all the connection .
    note wireless network connection IPv4 Address: in my pc it is  192.168.43.5


4.  Start your Server (WAMP server ).
     Put it online


4. Now in your Android phone browser Address write the IPv4 address that you have noted in step 2.
    in my case it is 192.168.43.5
    now it will open your server (wamp) page in your mobile browser.


you can also use static ip .
for this you have to set static IPv4 address in your wireless network adapter properties.


please comment if you have any doubt.....

Sunday 18 September 2011

Activate Windows 7 Free

Most wanted trick for ACTIVATE window.


Don’t have money to buy windows activation key? Here is step by step tutorial that explains how to activate windows 7 and Vista with win loader for free. This loader application will bypass the Microsoft’s WAT(windows activation technologies) and activate your winodws 7 or Vista in just few minutes.The application itself injects a SLIC (System Licensed Internal Code) into your system before Windows boots.
1)Download Windows 7 Loader from this link
2) Extract the rar files to your computer
3) Start the Windows Loader.exe
4)Click on Install to install the SLIC and updating the windows key.
Supported operating systems : Windows 7 Ultimate, Windows 7 Ultimate E, Windows 7 Professional, Windows 7 Professional E, Windows 7 Home Premium, Windows 7 Home Premium E, Windows 7 Home Basic, Windows 7 Starter, Windows 7 Starter E, Windows Vista Ultimate, Windows Vista Business, Windows Vista Business N, Windows Vista Home Premium, Windows Vista Home Basic, Windows Vista Home Basic N, Windows Vista Starter, Windows Server 2008 R2: Enterprise, Windows Server 2008 R2: Standard, Windows Server 2008 R2: Foundation, Windows Server 2008: Enterprise, Windows Server 2008: Standard, Windows Server 2008: Foundation, Windows Small Business Server 2008

Change Windows 7 Log-on Screen


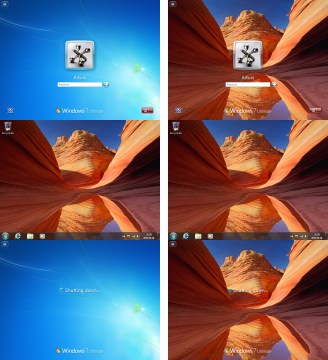
Here i am sharing one simple windows 7 software which allows you ti change log-on screen wallpaper or solid color.This application allows you to change in default log-on setting modifying as per your requirement.
Instant Logon Changer is nice,usefull and small software  which will help you in changing the windows log-on screen with your desktop wallpaper, any other image or any solid color which you want.:P
# ScreenShot:
http://arturdev.com/images/ilc/ilc_1.0_bef_aft.jpg

As you can see in the options, you have these much option to modify your windows 7 log-on screen.

# Download Link : Instant Logon Changer

enable/disable USB ports ?


HOW TO BLOCK/UNBLOCK USB PORT??
Read in one of the Article on Microsoft Website which tells you How to Disable Storage Devices.All you need to do is changes in Registry key would disable the device,but before changing any keys in registry read this note
“Warning : Serious problems might occur if you modify the registry incorrectly by using Registry Editor or by using another method. These problems might require that you reinstall your operating system. Microsoft cannot guarantee that these problems can be solved. Modify the registry at your own risk. If a USB storage device is already installed on the computer”
FOR ENABLING
1. Click Start, and then click Run.
2. In the Open box, type regedit, and then click OK.
3. Locate and then click the following registry key:
HKEY_LOCAL_MACHINESYSTEMCurrentControlSetServicesUsbStor
4. In the details pane, double-click Start.
5. In the Value data box, type 4, click Hexadecimal (if it is not already selected), and then click OK.
6. Exit Registry Editor.
FOR DISABLING
1. Click Start, and then click Run.
2. In the Open box, type regedit, and then click OK.
3. Locate, and then click the following registry key:
HKEY_LOCAL_MACHINESYSTEMCurrentControlSetServicesUsbStor
4. In the right pane, double-click Start.
5. In the Value data box, type 3, click Hexadecimal (if it is not already selected), and then click OK.
6. Quit Registry Editor.